TAPD
Visit Config UI at: http://localhost:4000 and go to Connections page.
Step 1 - Add Data Connections

Connection Name
Name your connection.
Endpoint URL
This should be a valid REST API endpoint
https://api.tapd.cn/The endpoint url should end with/.
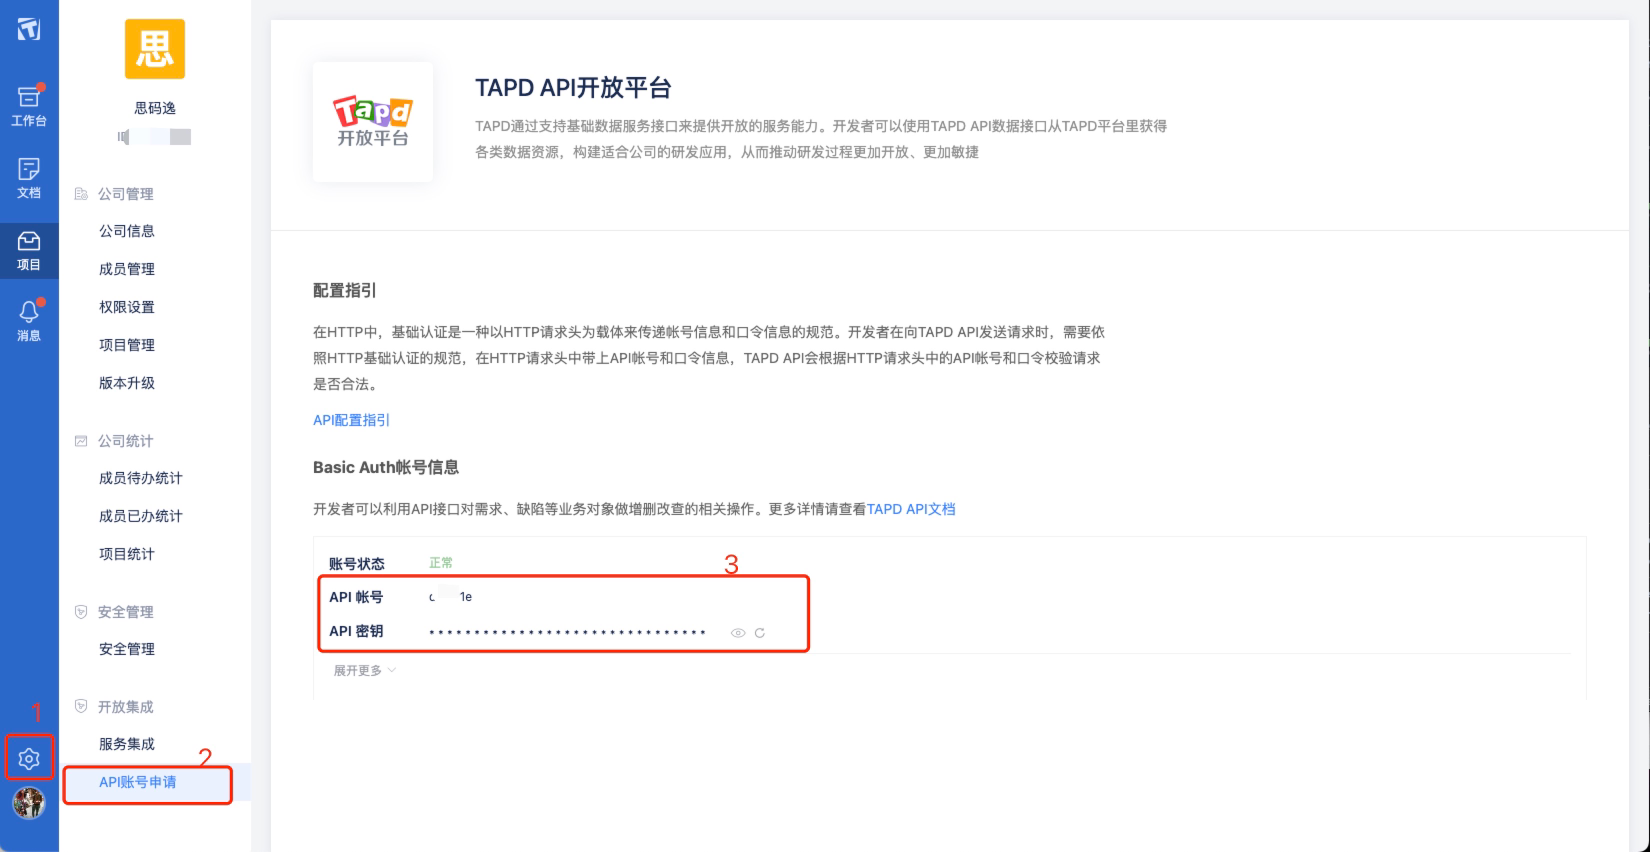
Username/Password
Input the username and password of your Tapd account, you can follow the steps as below.
Proxy URL (Optional)
If you are behind a corporate firewall or VPN you may need to utilize a proxy server. Enter a valid proxy server address on your network, e.g. http://your-proxy-server.com:1080
Ralte Limit (Optional)
For TAPD, we suggest you setting the rate limit to 3500
Test and Save Connection
Click Test Connection, if the connection is successful, click Save Connection to add the connection.
Step 2 - Setting Data Scope

You can find the campany id in your Tapd company dashboard.

Workspaces
Choose the Tapd workspaces to collect.
Data Entities
Usually, you don't have to modify this part. However, if you don't want to collect certain Tapd entities, you can unselect some entities to accerlerate the collection speed.
- Issue Tracking: Tapd issues, issue comments, issue labels, etc.
- Cross Domain: Tapd accounts, etc.
Step 3 - Adding Transformation Rules (Optional)

Without adding transformation rules, you can not view all charts in "Engineering Throughput and Cycle Time" dashboards.
Each Tapd workspace can be configured with different transformation rules.
Issue Tracking
- Requirement: choose the issue types to be transformed to "REQUIREMENT".
- Bug: choose the issue types to be transformed to "BUG".
- Incident: choose the issue types to be transformed to "INCIDENT".
- TODO: The issues that are planned but have not been worked on yet
- IN-PROGRESS: The issues that are work-in-progress
- DONE: The issues that are completed
Step 4 - Setting Sync Policy
You can choose how often you would like to sync your data in this step by selecting a sync frequency option or enter a cron code to specify your prefered schedule.
Troubleshooting
If you run into any problem, please check the Troubleshooting or create an issue