Configuring Incoming Webhook
Visit config-ui: http://{localhost}:4000.
Step 1 - Add a new incoming webhook
Go to the 'Data Connections' page. Create a webhook.
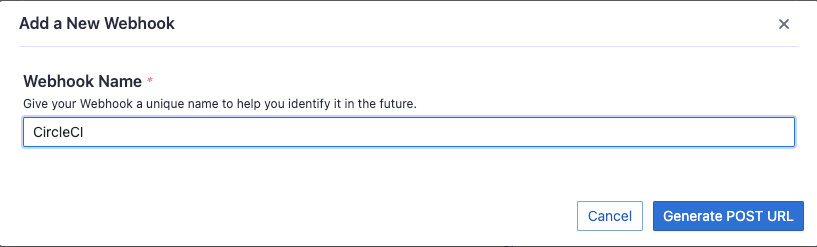
We recommend that you give your webhook connection a unique name so that you can identify and manage where you have used it later.
Step 2 - Create webhooks connection
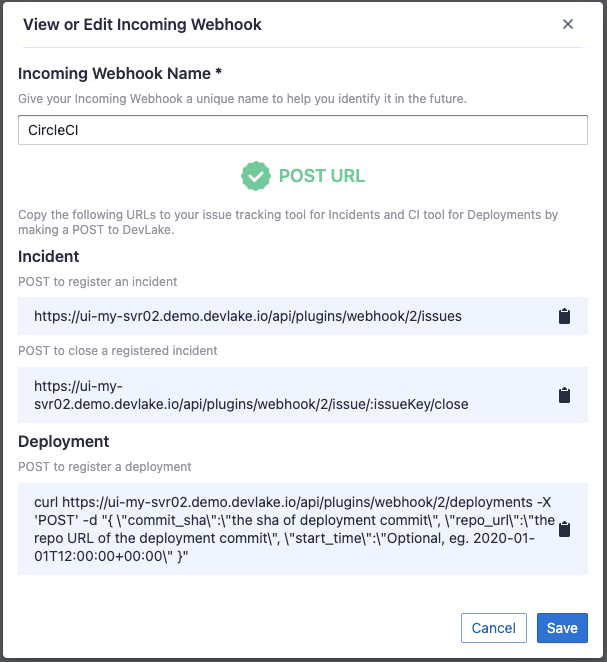
Click on Generate POST URL, and you will find three webhook URLs. Copy the ones that suit your usage into your CI or issue-tracking systems. You can always come back to the webhook page to copy the URLs later on.
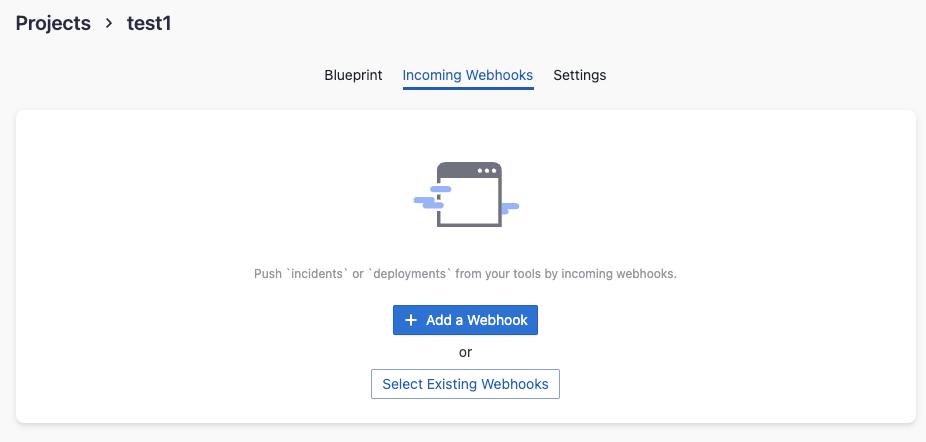
Step 3 - Use webhook in a project
Create a Project first, choose Incoming Webhooks, then you can Add a Webhook or Select Existing Webhooks.
Put webhook on the internet
For the new webhook to work, it needs to be accessible from the DevOps tools from which you would like to push data to DevLake. If DevLake is deployed in your private network and your DevOps tool (e.g. CircleCI) is a cloud service that lives outside of your private network, then you need to make DevLake's webhook accessible to the outside cloud service.
There're many tools for this:
- For testing and quick setup, ngrok is a useful utility that provides a publicly accessible web URL to any locally hosted application. You can put DevLake's webhook on the internet within 5 mins by following ngrok's Getting Started guide. Note that, when posting to webhook, you may need to replace the
localhostpart in the webhook URL with the forwarding URL that ngrok provides. - If you prefer DIY, please checkout open-source reverse proxies like fatedier/frp or go for the classic nginx.
Troubleshooting
If you run into any problem, please check the Troubleshooting or create an issue