Using Advanced Mode
Why advanced mode?
Advanced mode allows users to create any pipeline by writing JSON. This is useful for users who want to:
- Collect multiple GitHub/GitLab repos or Jira projects within a single pipeline
- Have fine-grained control over what entities to collect or what subtasks to run for each plugin
- Orchestrate a complex pipeline that consists of multiple stages of plugins.
Advanced mode gives utmost flexibility to users by exposing the JSON API.
How to use advanced mode to create pipelines?
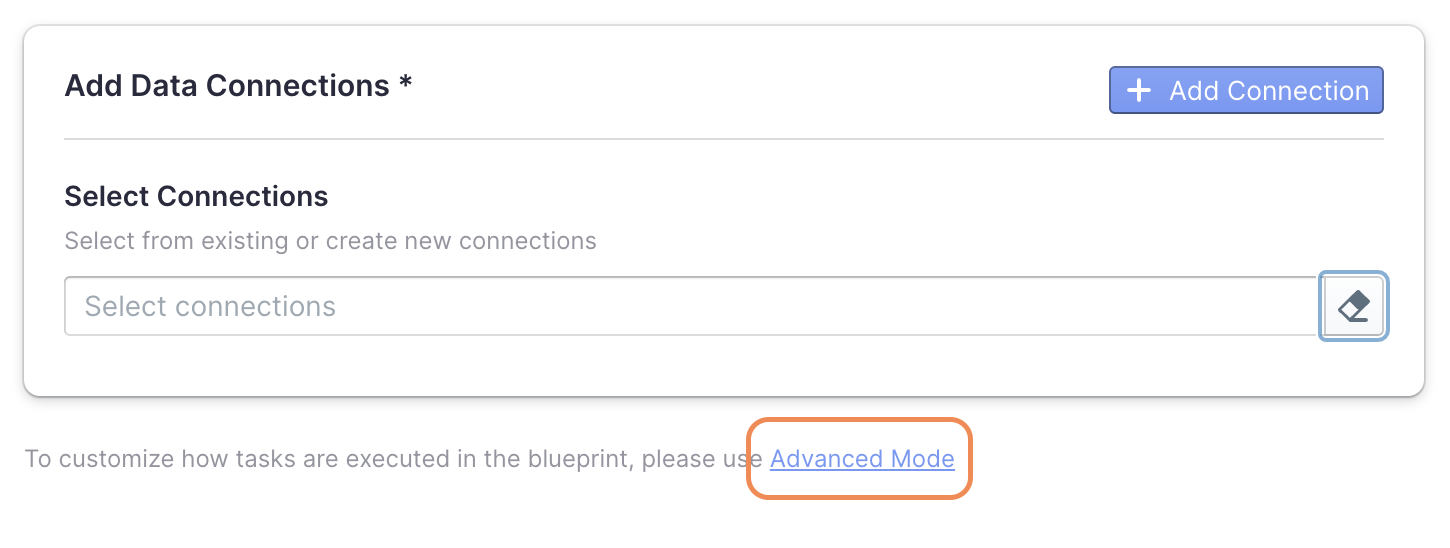
- Click on "+ New Blueprint" on the Blueprint page.

- In step 1, click on the "Advanced Mode" link.
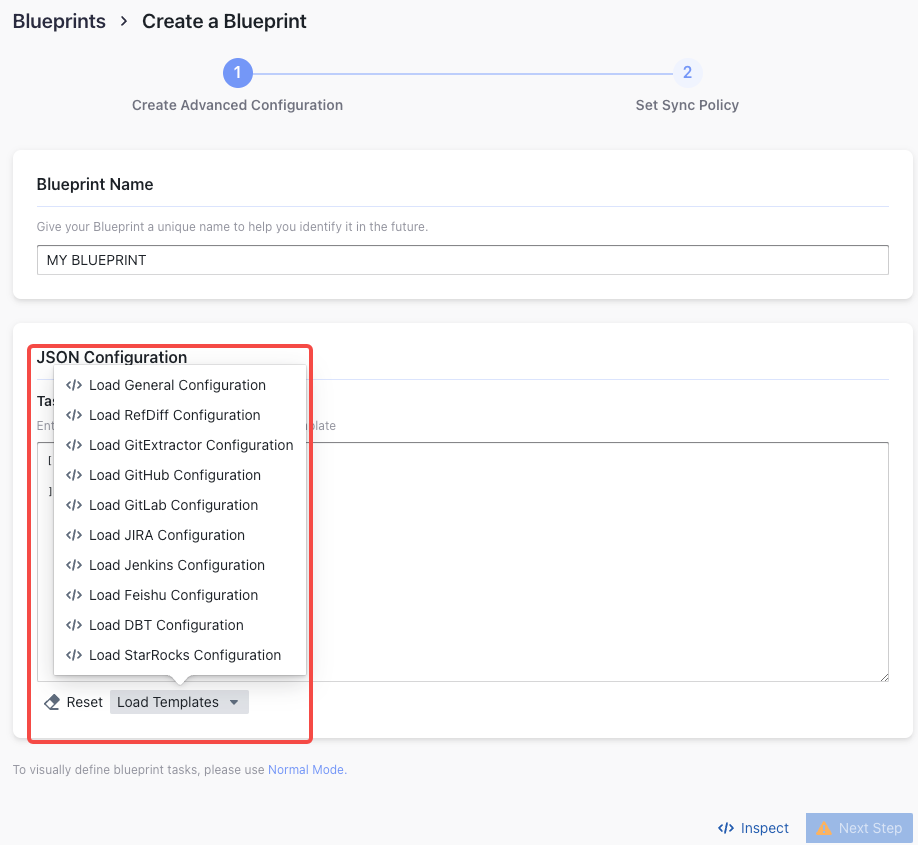
- The pipeline editor expects a 2D array of plugins. The first dimension represents different stages of the pipeline and the second dimension describes the plugins in each stage. Stages run in sequential order and plugins within the same stage runs in parallel. We provide some templates for users to get started. Please also see the next section for some examples.
- You can choose how often you would like to sync your data in this step by selecting a sync frequency option or enter a cron code to specify your preferred schedule. After setting up the Blueprint, you will be prompted to the Blueprint's activity detail page, where you can track the progress of the current run and wait for it to finish before the dashboards become available. You can also view all historical runs of previously created Blueprints from the list on the Blueprint page.
Examples
1. GitHub
Collect multiple GitHub repos sequentially. Below is an example for collecting 2 GitHub repos sequentially. It has 2 stages, each contains a GitHub task.
[
  [
    {
      "Plugin": "github",
      "Options": {
        "connectionId": 1,
        "repo": "incubator-devlake",
        "owner": "apache"
      }
    },
    {
      "Plugin": "github",
      "Options": {
        "connectionId": 1,
        "repo": "lake",
        "owner": "merico-dev"
      }
    }
  ]
]
GitHub:
connectionId: The ID of your GitHub connection at page http://localhost:4000/connections/github.owner: Just take a look at the URL: https://github.com/apache/incubator-devlake, owner isapache.repo: Just take a look at the URL: https://github.com/apache/incubator-devlake, repo isincubator-devlake.
2. GitLab
Collect multiple GitLab repos sequentially.
When there're multiple collection tasks against a single data source, we recommend running these tasks sequentially since the collection speed is mostly limited by the API rate limit of the data source. Running multiple tasks against the same data source is unlikely to speed up the process and may overwhelm the data source.
Below is an example for collecting 2 GitLab repos sequentially. It has 2 stages, each contains a GitLab task.
[
  [
    {
      "Plugin": "gitlab",
      "Options": {
        "connectionId": 1,
        "projectId": 152***74
      }
    }
  ],
  [
    {
      "Plugin": "gitlab",
      "Options": {
        "connectionId": 2,
        "projectId": 116***98
      }
    }
  ]
]
connectionId: The ID of your GitLab connection at page http://localhost:4000/connections/gitlab.projectId: GitLab repo's Project ID.
3. Jenkins
Collect multiple Jenkins jobs sequentially. Below is an example for collecting 2 Jenkins jobs sequentially. It has 2 stages, each contains a Jenkins task.
[
    [
        {
            "plugin": "jenkins",
            "options": {
                "connectionId": 1,
                "scopeId": "auto_deploy"
            }
        }
    ],
    [
        {
            "plugin": "jenkins",
            "options": {
                "connectionId": 2,
                "scopeId": "Deploy test"
            }
        }
    ]
]
connectionId: The ID of your Jenkins connection at page http://localhost:4000/connections/jenkins.scopeId: Jenkins job name.
4. Jira
Collect multiple Jira boards sequentially. Below is an example for collecting 2 Jira boards sequentially. It has 2 stages, each contains a Jira task.
[
    [
        {
            "plugin": "jira",
            "options": {
                "boardId": 8,
                "connectionId": 1
            }
        }
    ],
    [
        {
            "plugin": "jira",
            "options": {
                "boardId": 26,
                "connectionId": 1
            }
        }
    ]
]
connectionId: The ID of your Jira connection at page http://localhost:4000/connections/jira.boardId: Just take a look at the URL - it will be the last number in the address. Should look something like this at the end:RapidBoard.jspa?rapidView=8or/projects/xxx/boards/8. So8would be the board ID in that case.
5. Jira + GitLab
Below is an example for collecting a GitLab repo and a Jira board in parallel. It has a single stage with a GitLab task and a Jira task. As GitLab and Jira are using their own tokens, they can be executed in parallel.
[
    [
        {
            "plugin":"jira",
            "options":{
                "boardId":8,
                "connectionId":1
            }
        }
    ],
    [
        {
            "Plugin":"gitlab",
            "Options":{
                "connectionId":1,
                "projectId":116***98
            }
        }
    ]
]
6. TAPD
Below is an example for collecting a TAPD workspace. Since users can configure multiple TAPD connection, it's required to pass in a connectionId for TAPD task to specify which connection to use.
[
    [
        {
            "plugin": "tapd",
            "options": {
                "createdDateAfter": "2006-01-02T15:04:05Z",
                "workspaceId": 34***66,
                "connectionId": 1
            }
        }
    ]
]
createdDateAfter: The data range you wish to collect after the given date.connectionId: The ID of your TAPD connection at page http://localhost:4000/connections/tapd.workspaceId: TAPD workspace id, you can get it from two ways:- url:

- db: you can check workspace info from db._tool_tapd_workspaces and get all workspaceId you want to collect after execution of the following json in
advanced mode[
[
{
"plugin": "tapd",
"options": {
"companyId": 558***09,
"workspaceId": 1,
"connectionId": 1
},
"subtasks": ["collectCompanies", "extractCompanies"]
}
]
]
- url:
7. TAPD + GitLab
Below is an example for collecting a TAPD workspace and a GitLab repo in parallel. It has a single stage with a TAPD task and a GitLab task.
[
    [
        {
            "plugin": "tapd",
            "options": {
                "createdDateAfter": "2006-01-02T15:04:05Z",
                "workspaceId": 6***14,
                "connectionId": 1
            }
        }
    ],
    [
        {
            "Plugin":"gitlab",
            "Options":{
                "connectionId":1,
                "projectId":116***98
            }
        }
    ]
]
8. Zentao
Below is an example for collecting a Zentao workspace. Since users can configure multiple Zentao connection, it's required to pass in a connectionId for Zentao task to specify which connection to use.
[
  [
    {
      plugin: 'zentao',
      options: {
        connectionId: 1,
        productId: 1,
        projectId: 1,
        executionId: 1
      }
    }
  ]
]
connectionId: The ID of your Zentao connection at page http://localhost:4000/connections/zentao.productId: optional, ZENTAO product id, see "Find Product Id" for details.projectId: optional, ZENTAO product id, see "Find Project Id" for details.executionId: optional, ZENTAO product id, see "Find Execution Id" for details.
You must choose at least one of productId, projectId and executionId.
Find Product Id
- Navigate to the Zentao Product in the browser
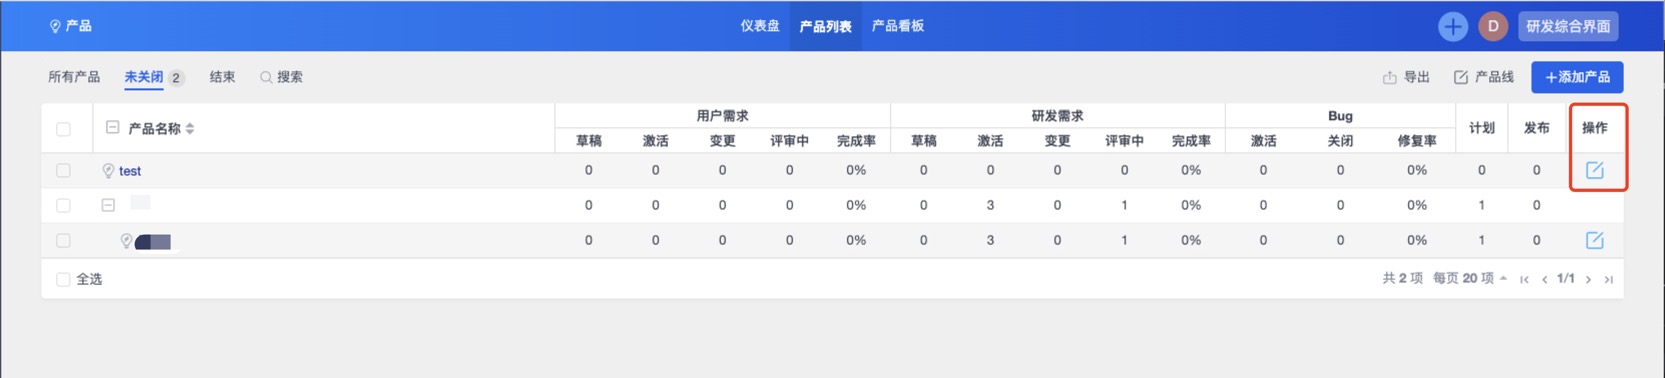
- Click the red square annotated in the pic above
- Then the number in the red circle above is
ProductId
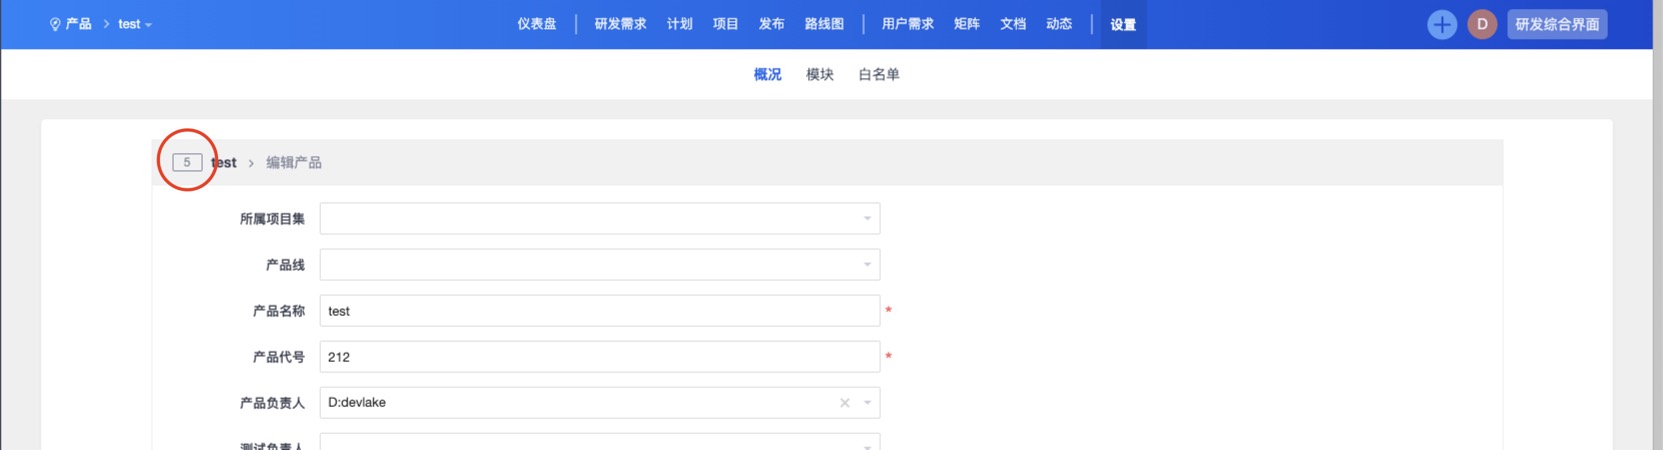
Find Project Id
- Navigate to the Zentao Project in the browser

- Then the number in the red square above is
ProjectId
Find Execution Id
- Navigate to the Zentao Execution in the browser

- Then the number in the red square above is
ExecutionId
9. BitBucket
Below is an example for collecting a bitbucket repo.
[
  [
    {
      "plugin": "bitbucket",
      "options": {
        "connectionId": 1,
        "owner": "apache",
        "repo": "devlake"
      }
    }
  ]
]
connectionId: The ID of your bitbucket connection at page http://localhost:4000/connections/bitbucket.owner: the owner of the repository.repo: the bitbucket repository name.
Editing a Blueprint (Advanced Mode)
This section is for editing a Blueprint in the Advanced Mode. To edit in the Normal mode, please refer to this guide.
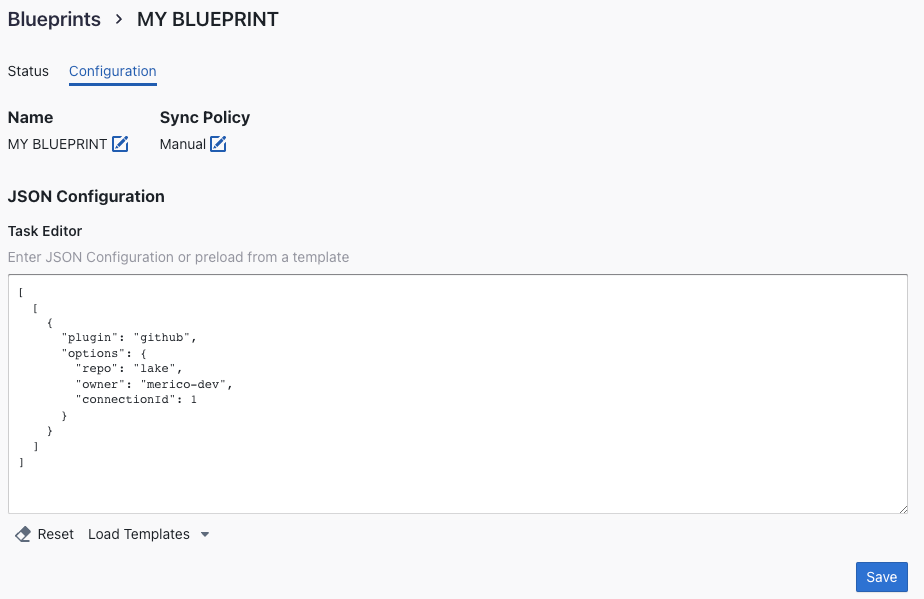
To edit a Blueprint created in the Advanced mode, you can simply go the Configuration page of that Blueprint and edit its configuration.
Troubleshooting
If you run into any problem, please check the Troubleshooting or create an issue