SonarQube
Visit config-ui: http://localhost:4000.
Step 1 - Add Data Connections
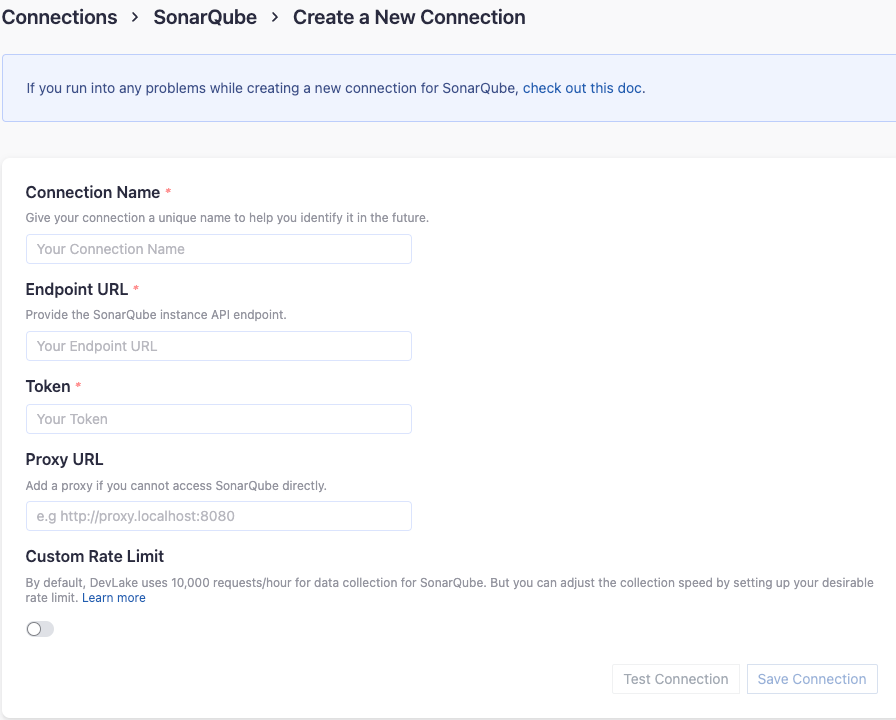
Connection Name
Name your connection.
Endpoint URL
This should be a valid REST API endpoint
http://<host>:<port>/api/
The endpoint url should end with /.
Auth Token(s)
Please use a system admin account to create the SonarQube token, because some SonarQube APIs require this permission to list all projects. Learn about how to create a SonarQube token.
Proxy URL (Optional)
If you are behind a corporate firewall or VPN you may need to utilize a proxy server. Enter a valid proxy server address on your network, e.g. http://your-proxy-server.com:1080
Fixed Rate Limit (Optional)
DevLake uses a dynamic rate limit at around 18,000 requests/hour to collect SonarQube data. You can adjust the rate limit if you want to increase or lower the speed.
Test and Save Connection
Click Test Connection, if the connection is successful, click Save Connection to add the connection.
Step 2 - Setting Data Scope
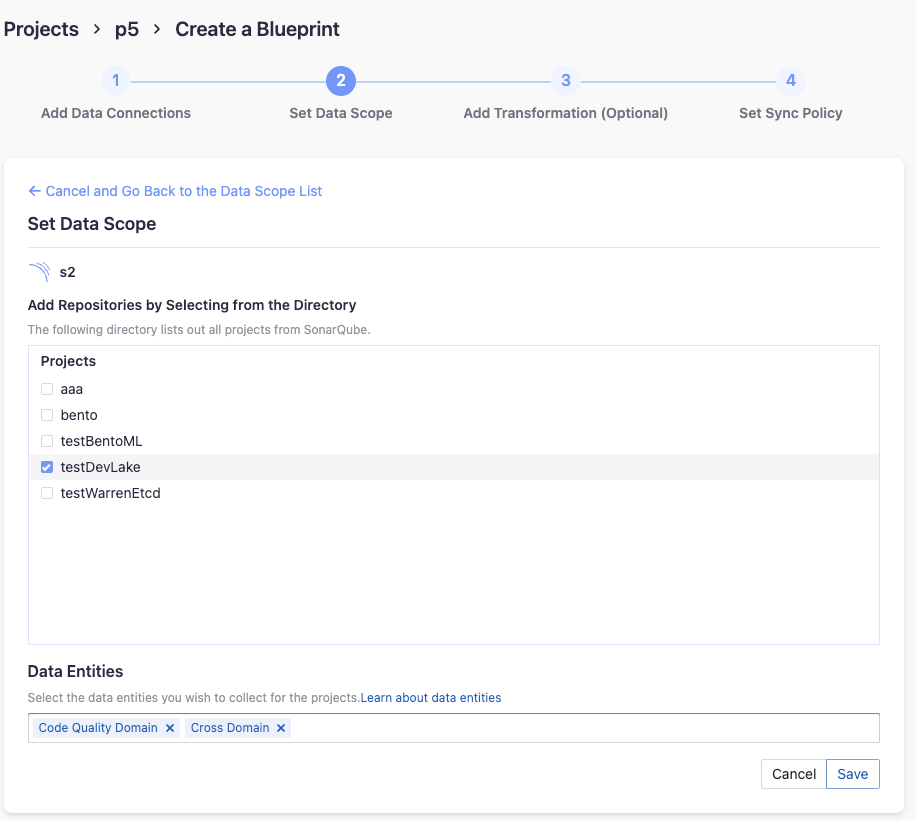
Projects
Choose the SonarQube projects to collect.
Data Entities
Usually, you don't have to modify this part. However, if you don't want to collect certain SonarQube entities, you can unselect some entities to accerlerate the collection speed.
- Code Quality Domain: SonarQube issues, issue code blocks, file metrics, hotspots, etc.
- Cross Domain: SonarQube accounts, etc.
Step 3 - Setting Sync Frequency
You can choose how often you would like to sync your data in this step by selecting a sync frequency option or enter a cron code to specify your prefered schedule.
Troubleshooting
If you run into any problem, please check the Troubleshooting or create an issue